Ragnarok Landverse Genesis
  • LANDVERSE GENESIS
    • 🗺️About Ragnarok Landverse Genesis
      • 📖Journey into Ragnarok Landverse Genesis
    • Gravity x Maxion
    • SkyMavis
  • Game Guide
    • 🐥Getting Started
      • 🎁Presale Guide
        • How to Purchase Presale Packs
        • How to Redeem Presale Packs during CBT
      • How to set up your Ronin wallet
      • How to register a Ragnarok Landverse Account
      • How to bind Ronin Wallet to Ragnarok Landverse account
      • How to download & install Ragnarok Landverse
      • How to login Ragnarok Landverse game
    • 🍼Starter Guide
      • 💡Tips for Quick Leveling
      • 🧑‍🚀How to use Titles
      • 🎮Basic Control
      • 📜Trainning Ground and Class 1 Job Change Guide
        • 🌅Back to Training Ground
      • 💼Job Classes
        • Stats
        • Weight Limit
        • Novice
        • Swordman
          • Knight (2-1)
        • Magician
          • Wizard (2-1)
        • Archer
          • Hunter (2-1)
        • Merchant
          • Blacksmith (2-1)
        • Thief
          • Assassin (2-1)
        • Acolyte
          • Priest (2-1)
      • 💲In-game Currency
      • 🐈How To Traveling to Malangdo Island
      • 🧙Mergician
      • ✈️How to Board and Navigate the Airship.
      • 💈Changing Hairstyles and Outfit Colors
    • 🆙Levels and Game Content
    • 📄Skill/Items/Mobs Modification
    • 🛒Minting Systems
    • 👫Party System & Party Buff
    • 📖Roverse Manual Book
    • 👕Character Progression
      • 🔓Socket Enchant
      • 🍪Equipment Landstone Enchant System
        • 🩳List of Equipment
      • 🪄Legendary Magician Enchant System
        • 📜Item List for Enchant
      • ⚒️Enchant Option
        • 💽Equipment Tier List
      • ⚒️Refinement System
      • 🪽Special Enhance Option System
      • 👨‍👨‍👧‍👧Union System
      • 🗃️Card Collection System
      • 🐕Pets System
      • 🐇Pets Collection System
      • 🔥Skill Limit Break System
      • 💄Costume Collection System
      • ⚙️Gear Score
      • 🛡️Gear Score Ranking
    • ⏰Daily Activities
      • 📅Daily attendance
      • 👺MVP Hunting Rebalance
      • 👧Sarah's Memory
    • 🗓️Weekly Activities
    • 👑VIP System
    • ⛏️Mining System
    • 🍀Yggdrasil's Rift
    • ⚡Stamina System
    • 🛄Monster Drop
    • 🃏Card Exchange System
    • ⚔️Hybrid Player Killing
    • 🏰Guild System
    • 🤼Declare War on Guilds
    • 🤺Automated Battle System
    • ♿Idle prevention System
    • 🌌Nova Space
    • 🌐Universal Exchange
      • 🪙Token Exchange
      • 💎Andamantine Exchange
      • 💰Zeny Exchange
      • ❤️‍🔥Limit Break Scroll Exchange
      • 🔄Pet Spirit Exchange
      • 🥌Elunium Oridecon Exchange
    • 🔹Moonstone Shop
      • 💱How to purchase Moonstone
      • 👩‍💻Kafra Premium Service
  • TOKEN ECONOMY
    • 📊What is a Token Economy?
      • How to purchase USDC and send to Ronin wallet
      • How to Swap USDC <--> ION
      • How to mint NFT from Ragnarok your game account
      • How to redeem NFT into your game account
      • Transaction Gas Fees
        • How to purchase RON
      • What is MAX Point?
    • ⚖️In-Game Tax System
    • 💵NFT Marketplace
      • How to purchase NFTs from Marketplace
      • How to sell NFTs in Marketplace
  • Other Information
    • 🔗Official Links
    • 🖥️PC Specifications
    • 🔧Fixing Patcher Download Issues
Powered by GitBook
On this page
  • Job Changing
  • Class Data
  1. Game Guide
  2. Starter Guide
  3. Job Classes

Swordman

PreviousNoviceNextKnight (2-1)

Last updated 4 months ago

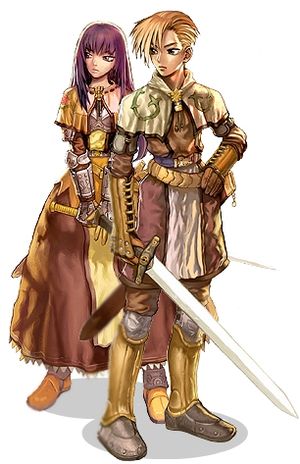
Swordmen are strong-willed fighters seeking to lead with their sword and shield. Though stubborn like the waves of the sea, swordmen are able to use their high attack skills to change the tide of the battlefield. Growing up in Prontera and its nearby town Izlude, they have learned that the best defense is the best offense.

Swordmen tend to have high ATK from swords and their skills boost the damage of these weapons. They can wear heavy armor and shield to boost their DEF and their high HP pool from skills and HP bonus significantly help with tanking mobs.

Job Changing

Once you reach Job Level 10, go to Izlude and enter the Swordman Guild on the west side of town at (Izlude 52 / 137). Talk to the Swordman NPC in the center room behind the desk who will change your job to Swordman.

Tips Empty Bottle can be purchased from NPC located in Comodo (cmd_in01 79 182).

Class Data

Skills

Skill
Description
Levels
Type

Hits an enemy with crushing force. If Fatal Blow skill is learned, Bash will have an added Stun effect at Level 6 and higher.

10

Offensive

Enables attacking and moving while receiving damage, but not effective when attacked by magic and offensive skills. Endure status will be canceled after caster is hit by 7 attacks. Has no effect in War of Emperium area.

10

Active

Restores HP every 10 seconds while idle. MaxHP affects how much HP is restored by this skill.

10

Passive

Uses 30 SP to inflict Fire elemental damage on 5x5 AoE around the caster and push them 2 cells backward. For 10 sec after Magnum Break, caster's weapon will receive 20% Fire elemental attack enhancement.

10

Offensive

Enrages a target, reducing Defense by VIT on Player and physical defense on Monster, while increasing it's Attack Power. Can't be used on Undead and Boss monsters.

10

Active

Increases One-Handed Sword and Dagger class weapon damage.

10

Passive

Increases Two-Handed Sword class weapon damage.

10

Passive

Quest Skills

Skill
Description
Levels
Type
Job Level Requirement
Quest

Empowered by rage, character enters a condition that is equivalent to Level 10 Provoke status when HP is reduced to less than 25% of MaxHP. Provoked status lasts until character HP is restored to more than 25% of MaxHP or if Provoke effect is nullified.

1

Passive

Inflicts Stun status on target when using Level 6 Bash or higher. The chance of inflicting Stun increases with Bash skill level and Base Level of the caster.

1

Passive

Restores HP every 10 seconds while idle. MaxHP affects how much HP is restored by this skill.

1

Passive

Job Bonuses

Level
Bonus Stat

Level: 2

Str: 1

Level: 6

Vit: 1

Level: 10

Dex: 1

Level: 14

Str: 1

Level: 18

Vit: 1

Level: 22

Dex: 1

Level: 26

Luk: 1

Level: 30

Agi: 1

Level: 33

Str: 1

Level: 36

Dex: 1

Level: 38

Vit: 1

Level: 40

Str: 1

Level: 42

Vit: 1

Level: 44

Luk: 1

Level: 46

Agi: 1

Level: 47

Str: 1

Level: 49

Str: 1

Level: 50

Str: 1

The table above shows the various bonus stats gained by a character at different levels. Each row represents a different level, and the columns show the specific bonus stat gained at that level. The bonus stats include Str (Strength), Vit (Vitality), Dex (Dexterity), Luk (Luck), and Agi (Agility). For example, at Level 2, the character gains 1 point in Str. At Level 6, the character gains 1 point in Vit.

ASPD

Equip
Attack Speed
From Novice

Bare Handed

156

0

Shield

-5

+5

Dagger

-7

+8

Sword (One Handed)

-7

+10

Sword (Two Handed)

-14

N/A

Axe (One Handed)

-15

−5

Axe (Two Handed)

-20

N/A

Mace

-10

0

Spear (One Handed)

-17

N/A

Spear (Two Handed)

-25

N/A

ASPD Potions
Usable

✔

✔

✔

Bash

Endure

Increase HP Recovery

Magnum Break

Provoke

Sword Mastery

Two-Handed Sword Mastery

Auto Berserk

Fatal Blow

Increase HP Recovery

Concentration

Awakening

Berserk

🍼
💼
656.png
645.png
Increase HP Recovery.png
Bash.png
657.png
Endure.png
Magnum Break.png
Two-Handed Sword Mastery.png
Provoke.png
Berserk.png
Sword Mastery.png
HP Recovery While Moving.png
Fatal Blow.png